
Beginner Guide to 3D Scanners
If you have ever tried to recreate a real object by hand in CAD, you already know where the frustration starts. Curves get messy, proportions drift, and a simple part can turn into an hour-long modeling session. A beginner guide to 3D scanners should start there, because scanning is not about replacing design skills - it is about speeding up the path from physical object to usable digital model.
For makers, designers, collectors, engineers, and home workshop enthusiasts, 3D scanning can feel like the missing piece between the real world and the rest of a digital workflow. It lets you capture an object’s shape, turn it into a model, and use that file for printing, reverse engineering, restoration, visualization, or archiving. The exciting part is that the category is more accessible than it used to be. The tricky part is that not every scanner fits every project.
Beginner guide to 3D scanners: what they actually do
A 3D scanner captures the surface geometry of an object and converts it into digital data. Instead of taking a flat photo, it measures depth and shape across many points. The result is usually a point cloud or mesh that software can refine into a 3D model.
That sounds straightforward, but there is an important distinction here. Most consumer and prosumer 3D scanners are best at capturing external surfaces, not the inside of an object. They also do not automatically create a perfect CAD file ready for manufacturing. In many cases, scanning gets you close, then cleanup and editing finish the job.
That is why beginners sometimes feel disappointed on day one. They expect a one-button experience and get a workflow instead. The good news is that once you understand that workflow, the technology starts making a lot more sense.
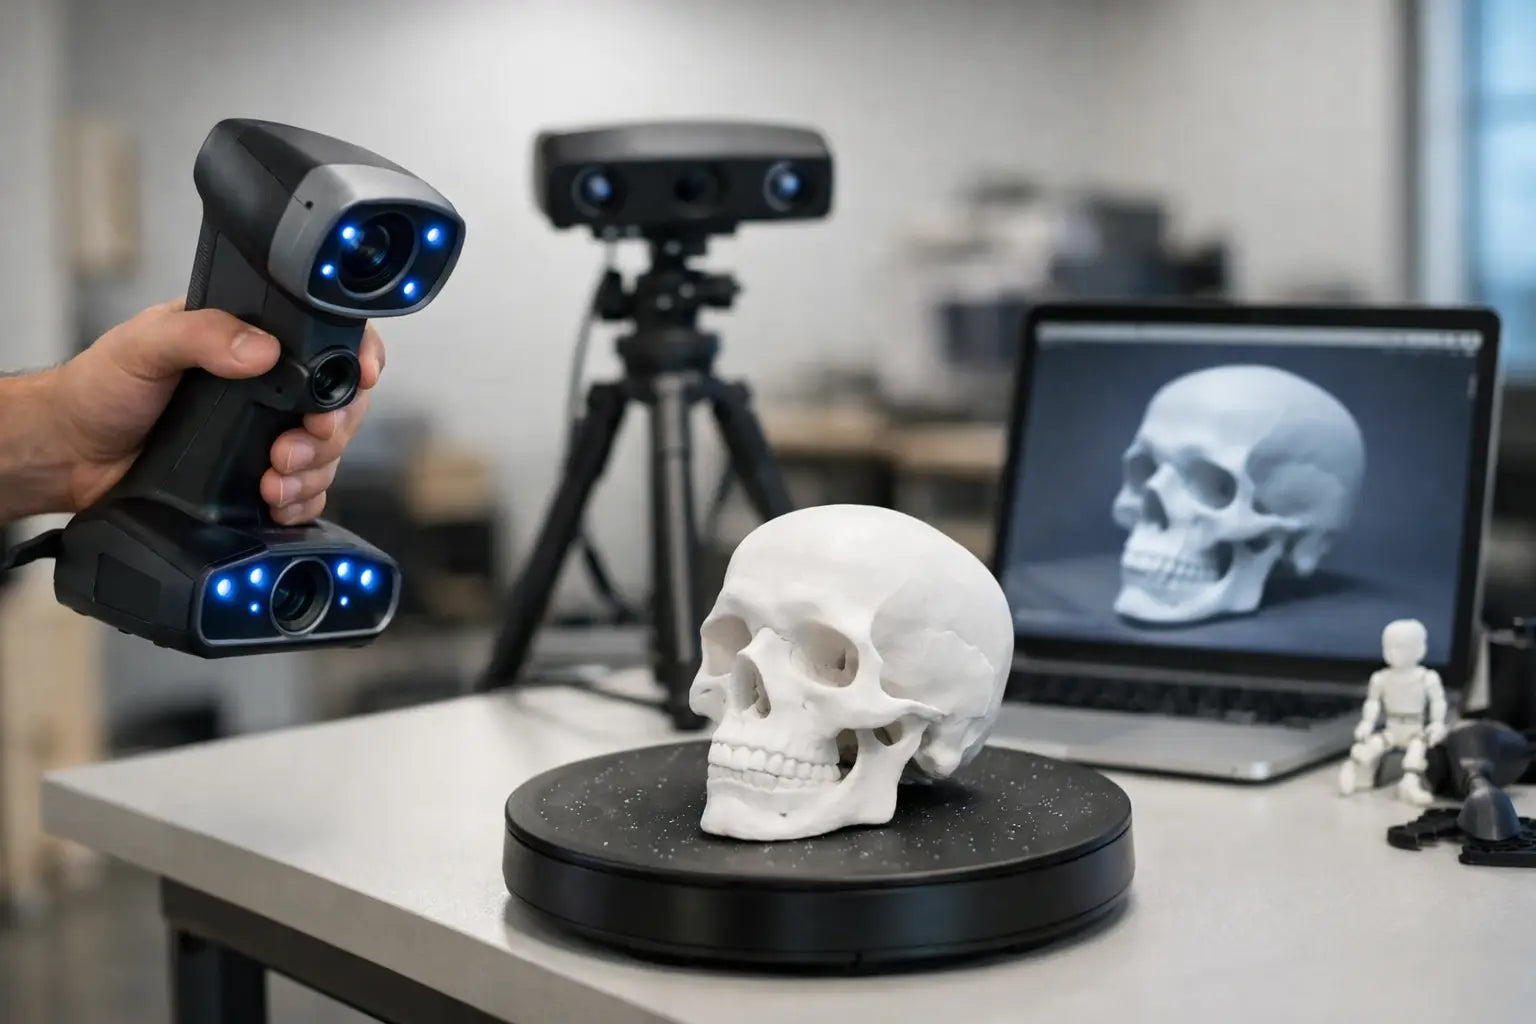
The main types of 3D scanners
The easiest way to understand the market is to think in terms of how scanners "see" an object. Structured light scanners project a known pattern onto a surface and measure how that pattern changes. They are often fast, detailed, and well suited for small to medium objects. Laser 3D scanners use laser lines or points to capture geometry and can perform well on detailed surfaces, though exact results depend on the system.
There are also photogrammetry-based approaches, where software builds a 3D model from many photos. This can be cost-effective, but it usually takes more manual effort and depends heavily on lighting, camera quality, and processing skill. For many beginners shopping for dedicated hardware, the most relevant choice is often between portable structured light systems and laser-based scanners.
Portability matters too. Some scanners are designed to sit on a turntable for small objects like figurines, tools, or mechanical parts. Others are handheld, which makes them more flexible for furniture, vehicle components, or body scanning. Handheld units feel more versatile, but they also require steadier movement and good tracking during capture.
What matters most when choosing your first scanner
Resolution and accuracy get the most attention, and for good reason, but they are not the same thing. Resolution refers to how much detail the scanner can capture on the surface. Accuracy refers to how close the digital scan is to the object’s real dimensions. If you are scanning collectibles or art pieces, visual detail may matter most. If you are scanning replacement parts or components that must fit, accuracy becomes a bigger priority.
Scan volume is another major factor. Some devices excel at small objects and struggle with larger items. Others handle bigger subjects but may not capture fine detail as well. It is smarter to buy for the objects you plan to scan most often than the occasional dream project.
Software is where a lot of the ownership experience is won or lost. Good scanning hardware paired with clunky software can turn an exciting purchase into a slow learning curve. Look for software that offers clear alignment tools, mesh cleanup, export options, and stable tracking. If you want to move from scan to 3D print, compatibility with common file formats matters more than flashy marketing terms.
Ease of use also deserves more respect than it gets. Some premium scanners are fast and powerful but assume a more technical user. Others are designed to be approachable for first-time buyers. If you are building a home maker setup or creative studio, a scanner that gets you good results without constant recalibration may be the better value.
A beginner guide to 3D scanners for real-world use cases
Your use case should drive the purchase, not the spec sheet alone. If you want to scan miniatures, jewelry, models, or small mechanical parts, prioritize high detail, stable capture, and close-range performance. A compact desktop-oriented scanner may serve you better than a larger handheld unit.
If your goal is reverse engineering household items, car parts, tools, or workshop components, accuracy and reliable geometry capture become more important. You may still need to rebuild surfaces in CAD afterward, but a clean scan can save serious time.
For artists, content creators, and game asset workflows, texture capture and overall shape may matter more than tight measurement tolerances. If you want to scan people, portability, speed, and safe operation matter a lot, because people move. Even small motion can affect the result.
There is also a difference between scanning for display and scanning for manufacturing. A decorative digital model can tolerate minor imperfections that would be a problem in a part that needs to fit with other components. That trade-off changes what "good enough" means.
Why some objects are harder to scan than others
Not every object is scanner-friendly. Glossy, reflective, transparent, or very dark surfaces often create problems because the scanner has trouble reading them consistently. A polished metal part, a glass vase, or a black shiny object may produce incomplete or noisy data.
This does not mean those items are impossible to scan. It means they usually require more preparation, such as scan spray, controlled lighting, or multiple passes. That is one reason beginners should not judge a scanner based on one difficult object. A scanner can perform beautifully on matte plastic and struggle on chrome.
Simple geometry can also be surprisingly difficult if the surface lacks features for tracking. A plain smooth cylinder, for example, gives the scanner less visual information to follow. Marker-based workflows can help, but they add another step.
What the scanning workflow really looks like
Most first-time buyers focus on the moment of capture. The full workflow is broader. You prepare the object and the environment, complete one or more scans, align them if needed, clean up stray data, fill holes, generate a mesh, and export the file for printing, modeling, or inspection.
That may sound technical, but it becomes routine quickly. In fact, the post-processing stage is often where premium scanners and better software justify their price. Faster alignment, cleaner meshes, and fewer failed scans can save a lot of time over weeks and months of use.
This is where buying quality matters. If 3D scanning is going to become part of your workshop, studio, or business workflow, convenience is not a luxury - it is a performance feature.
Common beginner mistakes to avoid
The biggest mistake is buying based on maximum advertised specs alone. A scanner with impressive numbers is not automatically the right fit for your project size, materials, or experience level. Another common mistake is underestimating the computer side of the setup. Large scan files and processing tasks can demand decent hardware.
Beginners also tend to move too fast while scanning. Smooth, controlled movement usually works better than trying to finish in one rushed pass. And many users forget that environment matters. Bad lighting, a shaky table, or clutter in the background can interfere with results.
One more mistake is expecting every scan to be production-ready. Sometimes the smartest workflow is to scan as a reference, then use that data to rebuild a cleaner model in CAD. That is still a major win.
Is a 3D scanner worth it for beginners?
If your projects involve physical objects on a regular basis, the answer is often yes. A 3D scanner can shorten design time, improve measurement confidence, and open up creative possibilities that are hard to match with manual modeling alone. It is especially compelling for makerspaces, home workshops, prop building, restoration work, collectibles, and 3D printing setups that are ready to level up.
But it depends on how often you will use it and what kind of patience you have for the learning curve. If you only need one object scanned once, a scanner may be overkill. If you are constantly measuring, recreating, customizing, or preserving real-world items, it starts looking like a smart long-term tool.
For shoppers building a premium home tech setup, this is one of those categories where buying the right device early can save money and frustration later. Your Tech Haven sits right in that sweet spot - helping enthusiasts and creators move from curiosity to capability with gear that feels future-ready, not disposable.
The best first scanner is not the one with the loudest specs. It is the one that fits your projects, your space, and the way you like to create. Start there, and 3D scanning stops feeling like advanced tech for someone else and starts feeling like part of your own workflow.

