
Racing Simulator Seat Setup Guide That Fits
A sim rig can have a great wheel, strong pedals, and a sharp display, then still feel off because the seat position is wrong. That is why a racing simulator seat setup guide matters more than most first-time buyers expect. The right setup does not just make your rig look complete - it changes braking consistency, steering precision, endurance, and how believable every lap feels.
If your lower back tightens after twenty minutes, your knees are too high, or you keep reaching for the wheel instead of driving naturally, your seat is costing you performance. The good news is that most of these issues are fixable with a few smart adjustments and a better understanding of how your body should sit in the cockpit.
What a good racing simulator seat setup should do
A proper racing simulator seat setup guide is really about one goal: putting your body in a repeatable driving position. In sim racing, consistency wins. You want to hit the same brake pressure, steering angle, and throttle input lap after lap, and that gets much easier when your body is supported instead of fighting the rig.
Your seat should help you stay planted under braking, keep your shoulders relaxed, and let your feet move cleanly across the pedals. It should also match the kind of driving you do. A GT-style setup usually favors a more upright position, while a formula-style rig places you lower with more leg elevation. Neither is universally better. It depends on what you race, how much space you have, and whether multiple people will use the rig.
Start with seat type before position
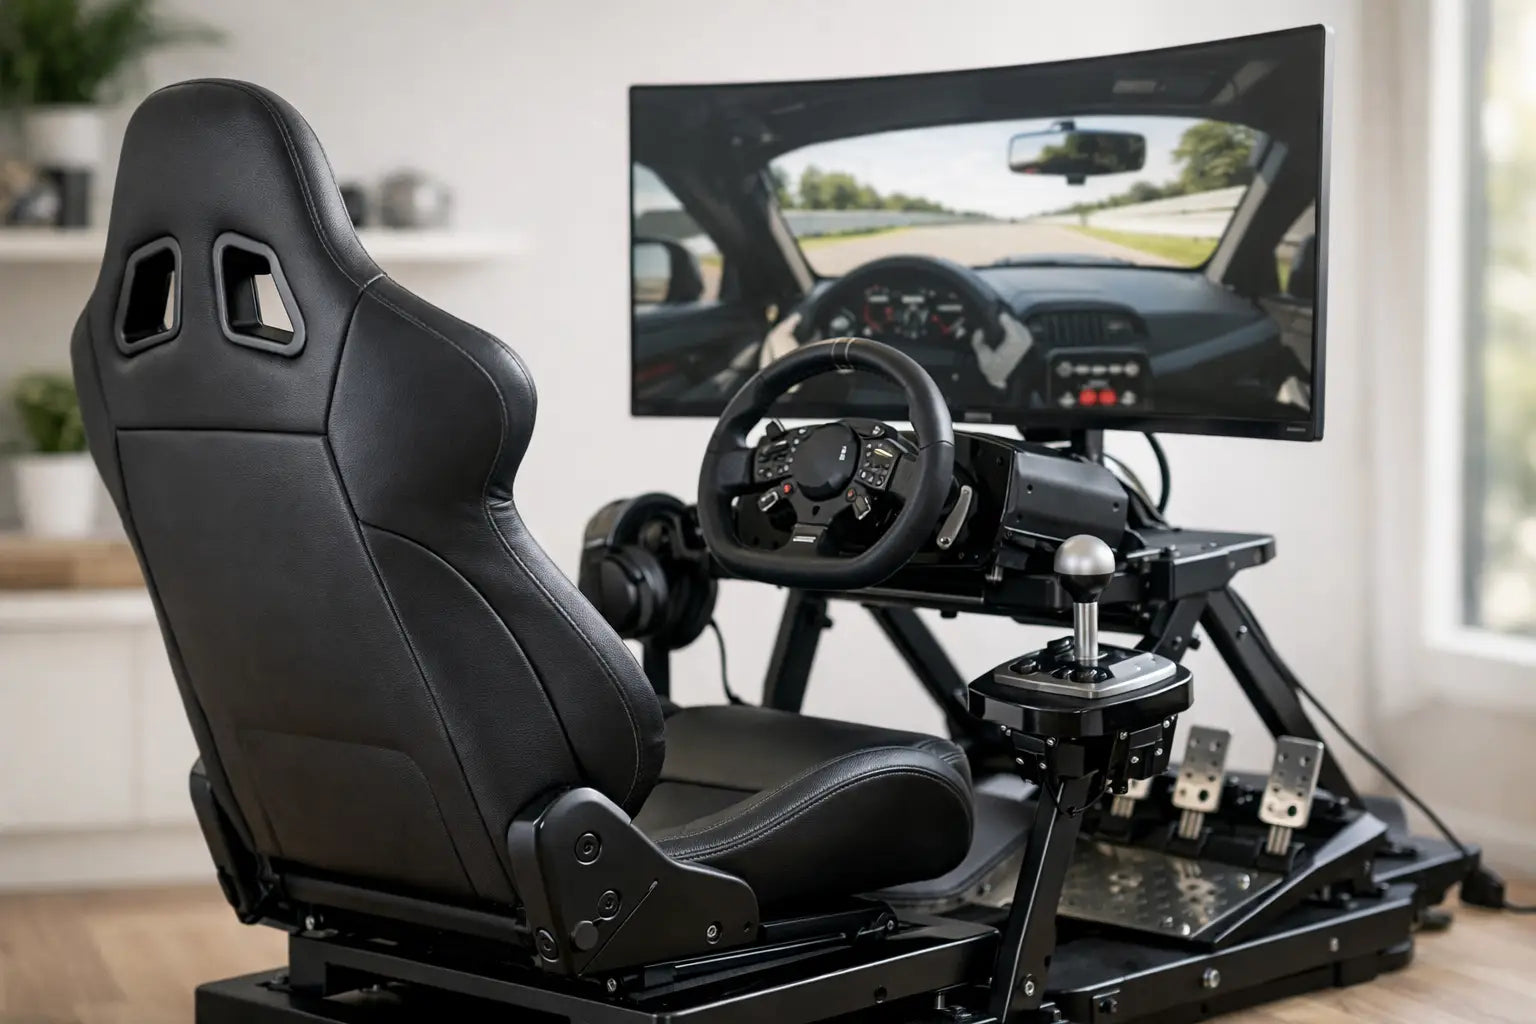
Before adjusting anything, make sure the seat itself fits the job. A reclining seat gives you flexibility and is often the easier choice for mixed-use setups, shared households, or anyone still finding their preferred driving position. A fixed bucket seat feels more locked-in and motorsport-inspired, but it demands a better fit from the start. If the shell is too narrow, too wide, or too aggressive for long sessions, no amount of tweaking will fully solve it.
Padding matters too. More cushioning sounds better, but extra softness can let your body shift during heavy pedal input. On the other hand, an ultra-firm race-style seat may feel authentic yet become tiring during longer sessions. For many home users, the sweet spot is support with just enough comfort to stay focused for an hour or two without needing constant repositioning.
Set seat height and angle first
Seat height changes more than visibility. It affects hip angle, leg extension, and how naturally your feet meet the pedals. Start by sitting so your hips feel stable and your thighs are supported without pressure building under the legs. If the front edge of the seat cuts into the back of your knees, lower it or reduce the tilt.
Seat angle should support your pelvis instead of dumping your weight into your lower back. A slight rearward tilt often works well, but too much can cause slouching and make smooth pedal work harder. You want to feel settled, not sunk. For GT driving, aim for a mildly reclined posture that keeps your torso supported while leaving your arms free to steer without strain.
If you are building a formula-style rig, more recline and higher leg positioning can feel right, but there is a trade-off. It looks dramatic and immersive, yet entry and exit become less convenient, and getting the pedal angle perfect becomes more important.
Dial in pedal distance before wheel distance
A lot of people adjust the wheel first because it is the most visible part of the rig. In practice, the pedals should usually come first. Your braking leg needs controlled bend at full pedal travel. If your leg locks out when you press the brake, you are too far away. If your knees stay deeply bent and cramped, you are too close.
Set the seat so you can fully press the brake with a slight bend in the knee. That bend gives you leverage and control, especially with load cell pedals where pressure matters more than travel. It also helps you brake hard without lifting yourself out of the seat.
Pedal angle matters almost as much as distance. If the pedal face is too upright or too flat for your ankle range, your feet will fatigue quickly. Try to create a natural ankle motion where you can transition between throttle and brake without lifting your whole leg more than necessary. Small changes here can make heel-toe style inputs, trail braking, and long stints noticeably smoother.
Bring the wheel to you, not the other way around
Once the pedals are set, move the wheel into reach. Your shoulders should stay in contact with the seat while your hands rest comfortably on the wheel. If you need to lean forward to steer, the wheel is too far. If your elbows are jammed and your wrists feel crowded, it is too close.
A good baseline is a soft bend in the elbows with your hands around the 9 and 3 positions. That gives you leverage without tension. Wheel height should let your forearms angle naturally toward the rim, not force your shoulders upward. Tense shoulders are a warning sign. So is wrist discomfort after short sessions.
Wheel tilt is often overlooked. A slightly angled wheel can improve comfort and realism, especially if you are aiming for a GT cockpit feel. The best position lets you rotate through corners without your wrists folding awkwardly at full lock.
Support your back so your legs can work
The lower back is where weak setups show themselves first. If lumbar support is missing, you may start every session upright and finish it slouched. That changes your pedal reach, your steering posture, and your consistency.
You do not need a medical-grade ergonomic chair experience, but you do need support where your spine naturally curves. Some seats include built-in lumbar shaping. Others may need a small cushion or adjustment. The key is moderation. Too much lumbar pressure can feel just as distracting as too little.
Side bolsters also deserve a quick reality check. They look purposeful and can keep you centered, but if they squeeze your ribs or thighs, comfort drops fast. For immersive racing, secure body positioning is great. For a home setup used several times a week, balance usually beats aggression.
Screen and seat position should work together
Seat setup is not isolated from the rest of the cockpit. If your monitor is too high, too far, or off-center, you may unconsciously change your posture to compensate. That defeats the work you did on the seat.
Try to align the center of your view with your natural seated eye line. You should be able to look straight ahead without lifting your chin. If you use triples or an ultrawide, the seat should place you centrally with the wheel and screen aligned on the same axis. VR adds flexibility, but even then, a poor seating position can create unnecessary fatigue because your body is still doing the driving.
Fine-tune for session length and driving style
There is no single perfect position for everyone. A setup that feels exciting for ten minutes can become exhausting after an endurance race. If you mostly hot lap or jump between games, you may prefer a slightly more relaxed position. If you are chasing competitive consistency, a firmer, more locked-in posture may serve you better.
Body size also changes the equation. Taller drivers often need more pedal travel room and attention to thigh support. Shorter drivers may need closer wheel placement or pedal adjustments that preserve control without overreaching. Shared rigs add another layer. In that case, seat sliders and clearly marked positions can save a lot of frustration.
This is where premium rig components start to justify themselves. Better adjustability means less compromise, and less compromise means the cockpit can evolve with your skills, your hardware, and the way you like to race.
Common setup mistakes that hurt performance
The most common mistake is prioritizing aesthetics over biomechanics. A low, aggressive seat angle may look race-ready, but if your knees, hips, and shoulders are fighting it, your lap times will show it. Another issue is setting the wheel and pedals around convenience instead of control. If getting in and out is easy but braking feels awkward, the setup still needs work.
People also underestimate adaptation time. A new seating position can feel strange simply because it is different. Give it a few sessions before making dramatic changes, but do not ignore real pain points. Discomfort that fades is one thing. Numbness, joint strain, or persistent back pain is a sign to adjust immediately.
How to know your setup is right
The clearest signal is that you stop thinking about it. Your hands find the wheel naturally, your feet land on the pedals cleanly, and longer sessions feel controlled instead of draining. You should finish a race feeling mentally taxed, not physically beat up.
A strong cockpit setup also makes your inputs more repeatable. Braking points become easier to trust, steering corrections get smaller, and your body stays quiet under pressure. That is when a seat stops being just another part of the rig and starts becoming part of your performance system.
If you are building or upgrading a high-end home racing setup, this is one area worth getting right from the start. The flashier components get the attention, but the seat is where every lap begins. Take the time to tune it like the rest of your gear, and the whole experience feels faster, smarter, and far more immersive.
A great sim rig should make you want one more session, not one less adjustment.

