Creator Desk Setup Example That Works
A cluttered desk drains momentum fast. If your camera gear is stacked on one side, your mic arm blocks the monitor, and charging cables snake across the surface, even simple tasks start feeling slower than they should. A strong creator desk setup example is not about copying a flashy social post. It is about building a workspace that helps you record, edit, stream, design, and stay focused without fighting your gear.
For most creators, the best setup balances three things at once - performance, comfort, and visual control. You want a desk that looks sharp on camera, but you also need it to support long editing sessions, reliable power, and room to grow. That is where smart planning matters more than buying random upgrades.
What a creator desk setup example should actually solve
A good creator workspace solves friction. It keeps the gear you use every day within reach, hides the accessories you do not need to see, and gives each tool a clear job. That means your monitor supports accurate work, your chair supports posture, your lighting flatters your shot, and your audio setup does not force awkward positioning.
This is where many setups go off track. People overspend on aesthetic extras before they lock in the core pieces. RGB light bars, wall panels, and designer accessories can look great, but they do not fix a desk that is too shallow, a chair that causes fatigue, or a monitor arrangement that makes editing harder. The smartest creator desk setup example starts with ergonomics and workflow, then levels up the look.
The foundation: desk, chair, and layout
Start with surface area. A creator desk should have enough width for at least one main monitor, your keyboard and mouse, and a dedicated zone for a microphone, notebook, control pad, or camera accessories. If you edit video, design graphics, or manage multiple windows all day, a cramped desk turns into a real performance problem.
Depth matters just as much. A deeper desk lets you place your monitor at a healthier distance and still keep room for lighting, an audio interface, or a laptop stand. If your screen sits too close because the desk is shallow, you may end up with eye strain and a tighter camera angle than you want.
Then comes the chair. This is not the exciting purchase, but it is often the most important one. Creators tend to spend long stretches recording, cutting footage, reviewing content, or managing uploads. A premium ergonomic chair or a high-quality gaming chair can make a noticeable difference in comfort and consistency. Style matters, especially if the chair appears on camera, but support matters more.
Think about zones on the desk. Your center should be your primary workflow area. The left or right side can become your accessory zone for headphones, a charging dock, camera batteries, or a tablet. This simple separation keeps the desk from becoming a catch-all surface.
Display setup: one screen or two?
The right display setup depends on what kind of creator you are. A streamer or editor often benefits from two monitors - one for the main task and one for chat, timelines, references, or file management. A designer or photographer may prefer one larger color-accurate display as the hero of the setup.
There is no universal winner here. Dual monitors increase multitasking speed, but they also take up more space and can make the desk feel visually busy. One ultrawide can create a cleaner look and still support multiple windows, though not everyone likes working on a wide curved panel for detailed creative work.
If you are building from scratch, prioritize resolution, color quality, and viewing comfort over novelty. A creator desk setup example that works for daily production usually includes a monitor stand or arm as well. That upgrade frees desk space, improves sightlines, and makes your setup feel more intentional.
Audio and camera gear need better placement than most people think
Great content often survives average visuals more easily than weak audio. That is why mic placement deserves real attention. A boom arm usually beats a desk stand because it gets the mic closer to your mouth without stealing valuable desk space. It also helps reduce clutter in your direct work area.
But there is a trade-off. Some boom arms look clean and professional, while others add visual noise or block part of the frame. If your setup appears on camera, placement should support both sound quality and aesthetics.
Your camera should also have a stable home. If it lives in a drawer between shoots, you create setup friction every time you want to record. A permanent mount, tripod station, or overhead arm can make quick capture much easier. This is especially useful for product creators, makers, and tutorial-focused channels.
Lighting is part production quality, part room design
Lighting changes everything. It shapes your on-camera image, influences how your workspace feels, and can make even a simple desk look premium. The key is layering. A main key light handles your face or subject, practical lighting adds atmosphere, and ambient room lighting keeps the background from looking flat.
A common mistake is relying too heavily on decorative LEDs while ignoring usable front lighting. Accent lights are great for mood, but if your face is underlit or your product shots look uneven, the setup is not doing its job. The best creator desk setup example uses lighting that performs first and looks impressive second.
If your room has windows, natural light can help, but it also introduces inconsistency. That may be fine for casual content, but creators who need repeatable results often prefer more control. Reliable artificial lighting gives you a more predictable workflow.
Power, cable management, and the hidden upgrades
A clean setup is not just prettier. It is easier to maintain, troubleshoot, and upgrade. Cable management is one of those details that separates a good desk from a truly polished one. Under-desk trays, cable sleeves, velcro ties, and smart power placement can dramatically improve the look and function of your space.
Charging is another overlooked area. Phones, cameras, lights, wireless peripherals, and tablets all compete for outlets and ports. A creator desk should have enough charging capacity for your daily tools without constant cable swapping. That is especially true if you stream, record, and edit from the same station.
This is also where buyers should think ahead. If you know you may add a second display, better speakers, a control deck, or a more advanced camera setup later, leave room for expansion now. Future-ready planning costs less than replacing furniture and accessories in six months.
A realistic creator desk setup example
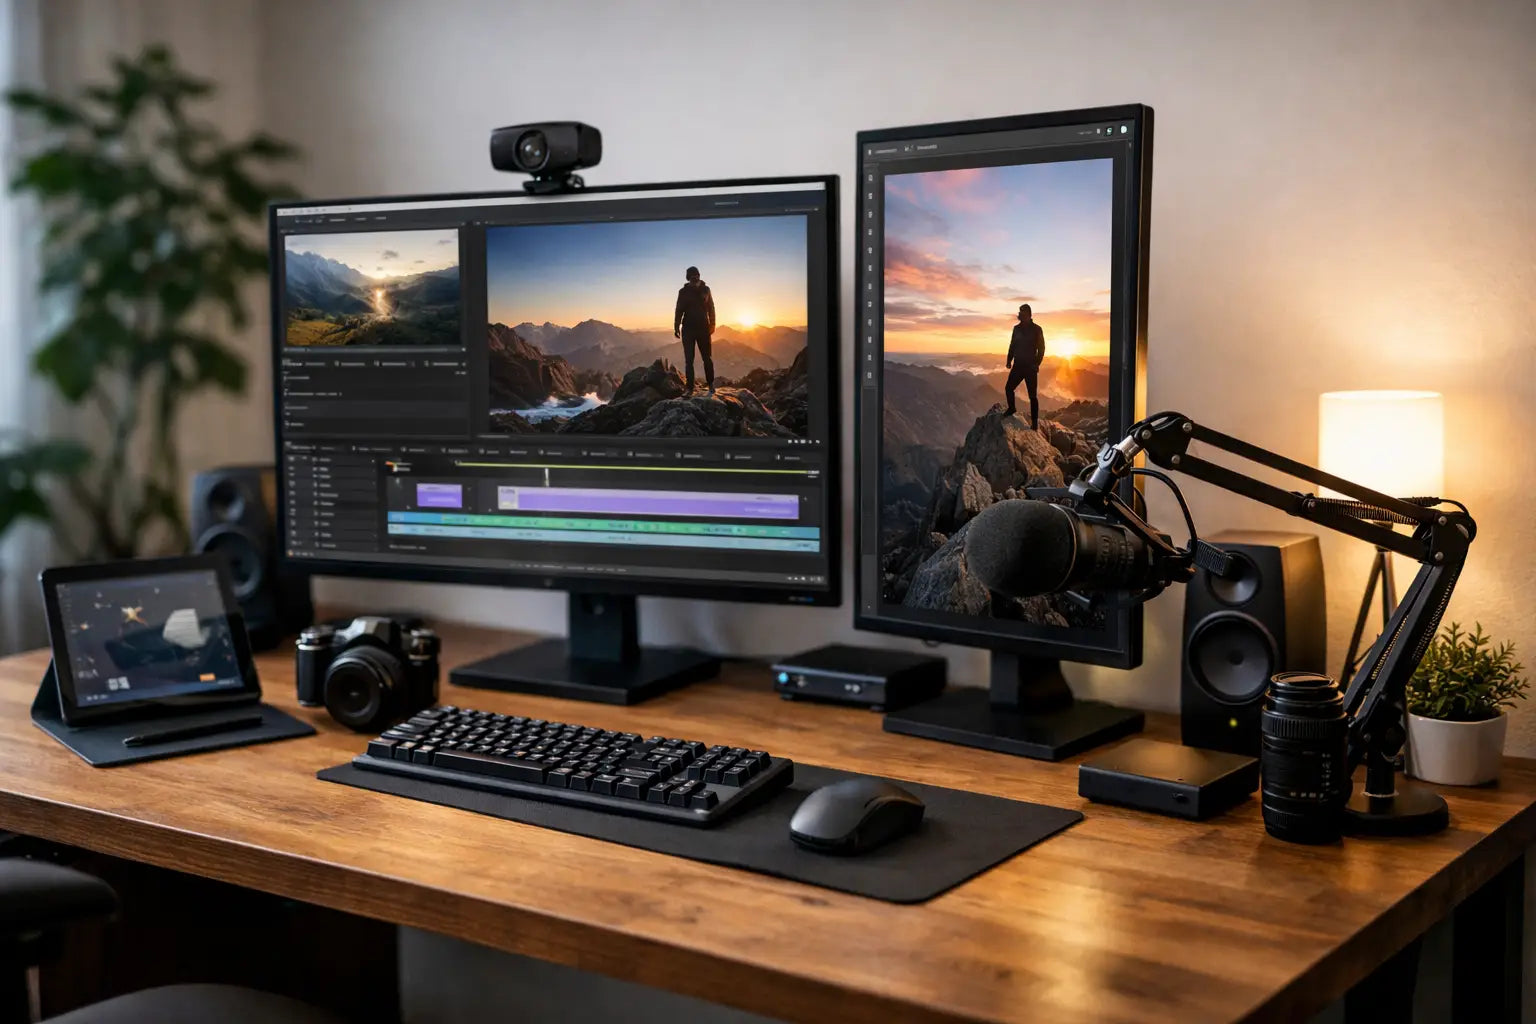
Here is a practical creator desk setup example for someone producing video, short-form content, livestreams, and light design work from home. Start with a premium desk wide enough for a main monitor and a secondary display in portrait or landscape orientation. Pair it with a supportive ergonomic or gaming chair designed for long sessions.
Mount the main monitor on an adjustable arm and place the second screen slightly off-center for dashboards, comments, or timelines. Add a mechanical keyboard, a precise wireless mouse, and a large desk mat to visually anchor the space. Use a boom arm with a quality USB or XLR microphone, and keep headphones on a stand below or beside the desk to reduce surface clutter.
For lighting, place a key light at a flattering angle and use subtle background lighting behind the desk or shelving. Set the camera on a dedicated mount so you can shoot without rebuilding your scene every time. Finish with an under-desk cable tray, a surge-protected power solution, and a charging hub for smaller devices.
That setup is not extreme, but it covers the essentials with room to grow. It supports production, looks strong on camera, and feels premium in daily use.
What to skip when building your setup
Not every upgrade deserves a place in phase one. Tiny decorative gadgets, oversized speakers for a small room, and trendy accessories with no clear function can inflate the budget without improving output. If you are choosing between a better chair and a decorative shelf light, the chair wins almost every time.
You should also be careful with overbuilding. If you mainly write, edit photos, or manage content calendars, you may not need a massive dual-monitor rig with studio-grade audio gear. Bigger is not always better. Better fit is better.
Build for the way you create now, not the way the internet tells you to create
The strongest setups feel personal because they are designed around real habits. A podcaster needs different priorities than a product reviewer. A livestreamer works differently than a 3D maker or video editor. Your desk should reflect your workflow, not somebody else's highlight reel.
That is the bigger opportunity with a high-performance workspace. When every piece has a reason to be there, the setup does more than look impressive. It helps you create faster, stay comfortable longer, and enjoy the process more. If you are investing in better gear, make it count where it matters most - the tools you touch every day and the environment that keeps you in motion.