
How to Start 3D Printing at Home
The first time you watch a printer turn a digital file into a real object, it feels like the future showed up early. That’s exactly why so many makers, gamers, hobbyists, and home tech enthusiasts want to learn how to start 3D printing. The good news is that getting started is more accessible than ever. The catch is that a smart start matters, because the right machine, material, and setup will save you time, frustration, and wasted filament.
If you’re building out a creative workspace, adding a 3D printer can be one of the most rewarding upgrades you make. It opens the door to custom gaming accessories, desk organizers, replacement parts, cosplay pieces, prototypes, and one-off creations that simply aren’t practical to buy off the shelf. But 3D printing is not plug-and-play in every case. The best experience comes from matching your goals with the right equipment and learning a few fundamentals before your first print.
How to start 3D printing without buying the wrong machine
The biggest beginner mistake is shopping by hype alone. A low price can be tempting, and so can a long feature list, but what matters most is fit. Before you compare specs, decide what you actually want to print.
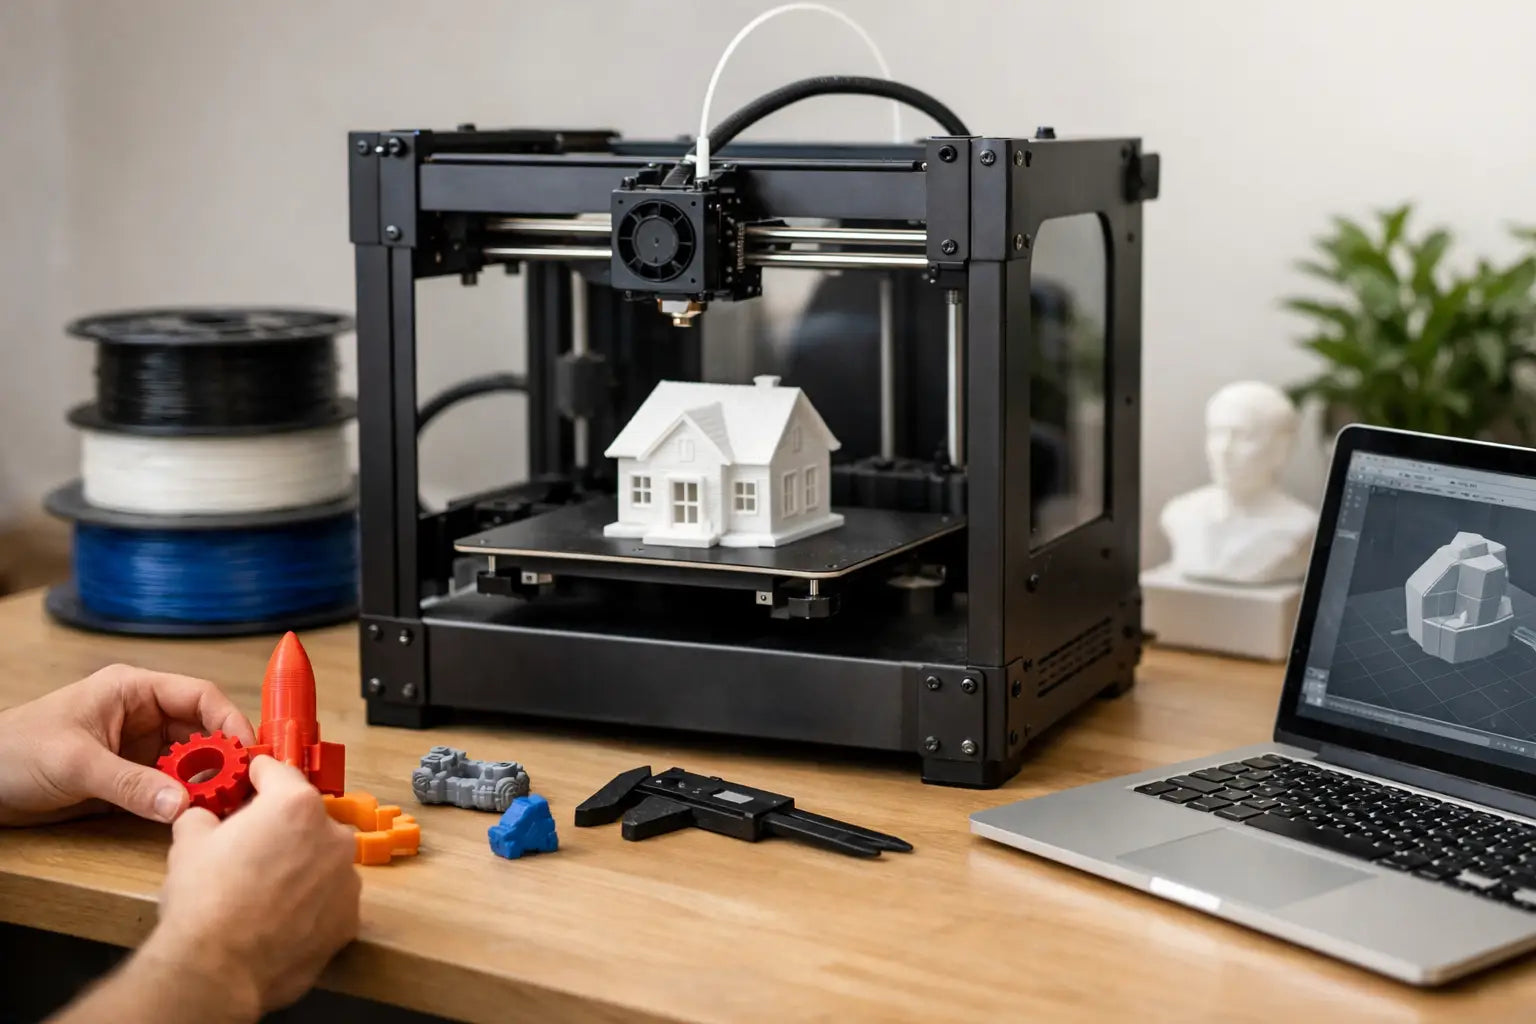
If your focus is tabletop terrain, cosplay parts, simple tools, home organization, or functional prototypes, an FDM printer is usually the right place to begin. FDM stands for fused deposition modeling, and these printers build objects by laying down melted filament one layer at a time. They tend to be the most approachable option for home users, especially if you want larger print volumes and lower material costs.
If your goal is highly detailed miniatures, jewelry concepts, dental models, or display pieces with very fine surface detail, a resin printer may be more appealing. Resin printing can deliver impressive precision, but it also asks more from your workspace and workflow. You’ll need to handle liquid resin carefully, manage odors, and wash and cure finished parts. For many first-time users, that extra complexity is worth it only if detail is the top priority.
This is where being honest about your tolerance for tinkering helps. Some people enjoy calibrating, upgrading, and fine-tuning every part of the machine. Others want a more guided experience with easier setup and fewer variables. Neither approach is wrong. It just changes which printer feels like a great purchase versus an exhausting one.
What you really need to begin
A 3D printer is the headline item, but it is not the whole setup. To start well, think in terms of a small printing ecosystem.
You’ll need the printer itself, printing material, slicing software, a few basic tools, and a stable place to run the machine. For FDM, that usually means filament, a scraper or print removal tool, flush cutters, and maybe a deburring tool or sandpaper for cleanup. For resin, the setup is more involved, with gloves, cleaning supplies, wash and cure equipment, and a better-controlled workspace.
The software side is easier than many beginners expect. Most users download or create a 3D model, then use slicer software to convert that design into instructions the printer can follow. At first, you do not need advanced design skills. You can begin with ready-made models, learn the print process, and move into custom design later.
A solid table matters more than people think. Printers vibrate, and a shaky desk can affect print quality. Ventilation matters too, especially with resin or high-temperature materials. If your machine is going into a home office, workshop, or game room, choose a spot that feels intentional, not temporary.
Choosing filament and materials for your first prints
For most beginners using FDM, PLA is the easiest material to start with. It’s popular for good reason. PLA generally prints at lower temperatures, warps less than many alternatives, and is forgiving while you learn the basics. If you want a smooth path into the hobby, start there.
PETG is another common option once you want more durability and heat resistance. It can be stronger for practical parts, but it may require more tuning than PLA. ABS and other advanced materials can be excellent in the right hands, though they often bring more challenges with warping, fumes, or enclosure requirements.
This is one of the clearest examples of how to start 3D printing the right way: don’t choose your first material based on what sounds most advanced. Choose the material that gives you the best chance of consistent success. Reliable early wins make the whole learning curve much more enjoyable.
For resin users, material choice also depends on purpose. Standard resin can produce sharp detail, while tougher specialty resins are better for parts that need more impact resistance. Again, the trade-off is simplicity versus performance. Premium results often come with a more demanding workflow.
Your first setup and calibration
When your printer arrives, resist the urge to jump straight into a large, ambitious print. Start with assembly and calibration done carefully. A rushed setup often leads to bad first impressions that have more to do with skipped steps than printer quality.
Bed leveling is one of the first things FDM users need to understand. If the nozzle is too close or too far from the print surface, the first layer can fail, and if the first layer fails, the whole print usually follows. Some printers make this easier with auto-leveling features, which can be a major quality-of-life advantage for new users.
After leveling, print a small test model. Watch the first layer. Look for clean, even lines and good adhesion. If the print starts lifting, stringing excessively, or looking uneven, pause and adjust before wasting more material. Early troubleshooting is part of the process, not a sign that you chose the wrong hobby.
For resin printers, setup includes leveling the build plate, checking exposure settings, and preparing your wash and cure routine. Resin printing can feel more technical upfront, but once dialed in, it can be impressively consistent for detail-heavy work.
Learning the software side without overwhelm
The software can look intimidating at first, but most beginners only need a handful of settings to start printing successfully. Layer height, print speed, infill, supports, and temperature are the main ones you’ll see repeatedly.
Layer height affects detail and print time. Lower layer heights can look better, but they take longer. Infill controls how solid the inside of the object is. More infill can make parts stronger, but it also uses more material and time. Supports help print overhangs, though removing them can leave marks on the surface.
At the beginning, preset profiles are your friend. Use the settings recommended for your printer and material rather than trying to optimize everything on day one. Once you’ve printed several successful models, then start experimenting. That’s the point where tuning becomes productive instead of random.
If you want to design your own parts, you can add CAD software later. Many users spend their first weeks simply learning how to print downloaded models well. That is still real progress. Design can come next.
What beginners should print first
Your first prints should teach you something useful. A calibration cube, benchy boat, cable clip, controller stand, or simple storage tray all make sense because they reveal different aspects of print quality without consuming too much time or material.
Functional prints are especially satisfying for beginners. There’s a big difference between reading about layer lines and holding a custom part you made for your desk, workshop, or gaming setup. That moment is where the hobby starts to feel valuable, not just interesting.
Try to avoid giant multipart helmets, highly articulated mechanisms, or ultra-detailed display pieces as your very first projects. Ambitious prints are part of the fun, but confidence builds faster when you stack a few straightforward wins first.
Common problems and what they usually mean
Every 3D printing setup has a learning curve. Filament may not stick. Layers may shift. Corners may warp. Resin prints may fail to adhere to the build plate. These problems are common, and most have practical causes.
Poor bed adhesion often comes from leveling issues, incorrect temperatures, or a dirty build surface. Stringing can point to temperature settings or retraction tuning. Warping may mean your material needs a more stable environment or different bed conditions. Resin failures often trace back to plate leveling, exposure settings, or model orientation.
The key is to change one variable at a time. Beginners often make five adjustments at once, then have no idea which change fixed the issue or made it worse. A calm, methodical approach gets better results than constant guessing.
Is 3D printing worth it for home users?
For the right person, absolutely. If you enjoy customizing your space, building useful gear, prototyping ideas, or creating parts on demand, a 3D printer can become one of the most versatile tools in your home setup. It fits especially well alongside other enthusiast gear because it supports creativity and performance at the same time.
That said, it’s not magic. You are trading some convenience for capability. Printing takes time. Maintenance is real. Failed prints happen. But for people who value making over merely buying, that trade is often more than worth it.
If you’re ready to invest in future-ready gear, take the same approach you would with any premium tech purchase: buy for the experience you want, not just the spec sheet you saw first. Start with a printer that fits your goals, give yourself room to learn, and let your first few successful prints pull you forward.
